Master Handstands in 6 Weeks: 2025 Yoga Drills
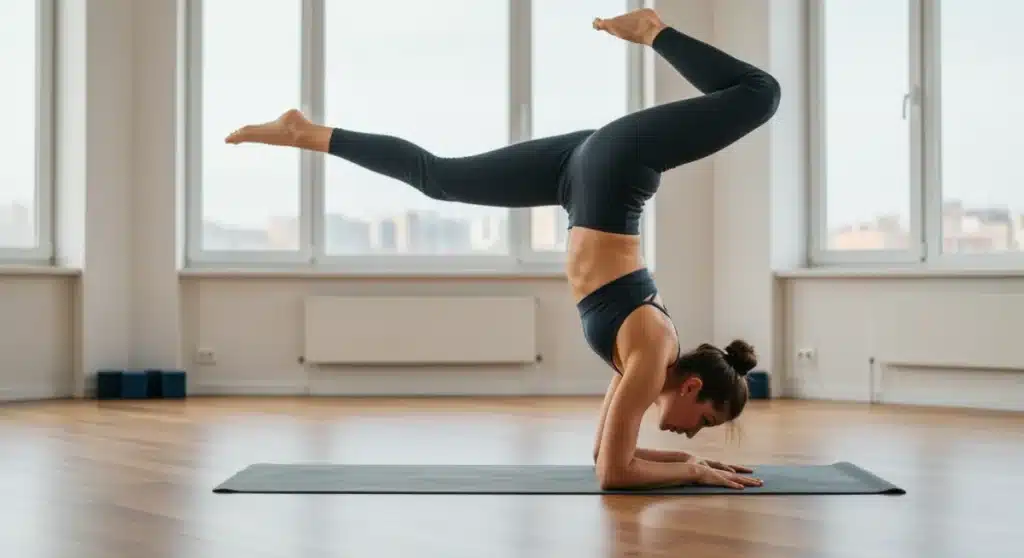
Mastering handstands in just 6 weeks is an achievable goal with dedicated practice and a structured approach, leveraging specific yoga drills to build essential strength, balance, and confidence.
Are you ready to transform your yoga practice and achieve an iconic pose? This is your Time-Sensitive Opportunity: Master Handstands in 6 Weeks with These Expert Yoga Drills (2025 Edition). Imagine the feeling of defying gravity, finding perfect balance, and experiencing your practice from a new perspective. This guide is designed to help you embark on that journey, providing a clear, actionable path to handstand mastery within a focused six-week timeframe.
Laying the Foundation: Core Strength and Wrist Preparation
Before launching into any inversion, a solid foundation is paramount. This initial phase focuses on building the necessary core strength and ensuring your wrists are adequately prepared for the demands of a handstand. Neglecting these foundational elements can lead to injury and hinder progress, making a mindful approach essential for long-term success.
Developing core strength isn’t just about aesthetics; it’s about creating a stable center from which all movement originates. For handstands, a strong core acts as your anchor, preventing your body from collapsing and allowing for controlled balance. Simultaneously, strong, flexible wrists are crucial, as they bear a significant portion of your body weight. Proper preparation here mitigates strain and supports your journey upward.
Essential Core Strengthening Drills
Engaging your deepest abdominal muscles is key to handstand stability. These drills target the core from various angles, ensuring comprehensive strength development.
- Plank Variations: Start with basic planks, then progress to side planks and planks with leg lifts to challenge your stability. Hold each for 30-60 seconds, focusing on keeping your body in a straight line.
- Hollow Body Holds: Lie on your back, lift your head, shoulders, and legs slightly off the ground, engaging your core. This position mimics the handstand shape and builds deep abdominal strength. Hold for 20-30 seconds.
- L-Sit Progressions: Begin with tucked L-sits, gradually extending your legs as your core strength improves. This drill strengthens both your core and hip flexors, vital for lifting into a handstand.
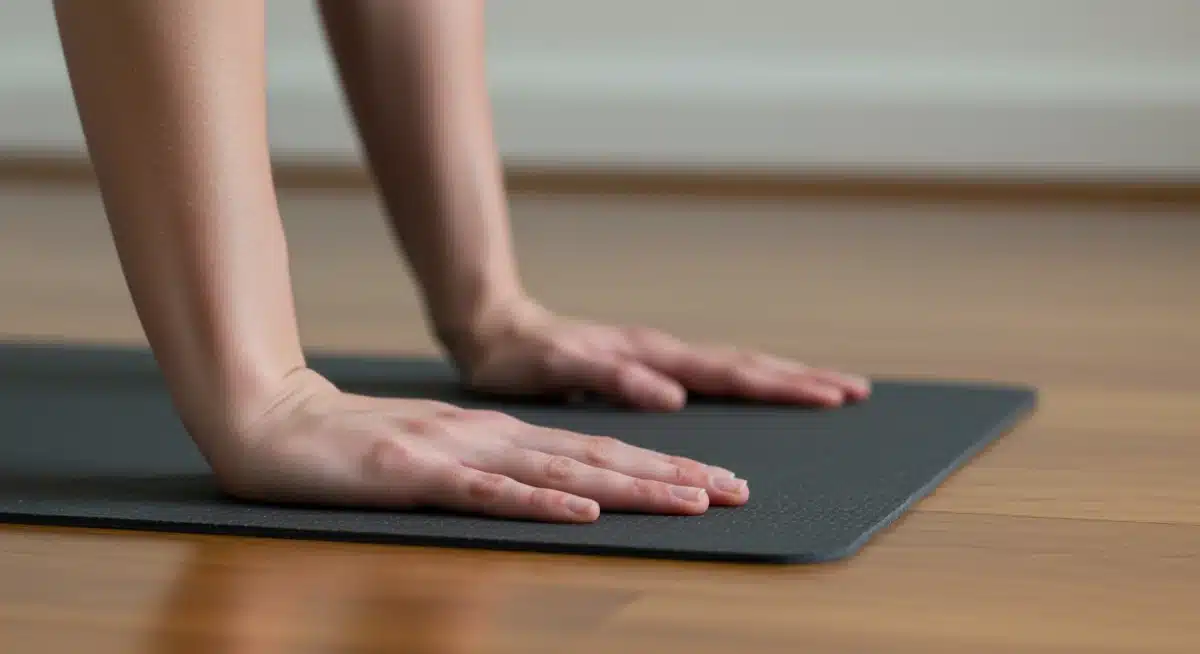
Wrist Mobility and Strengthening
Your wrists are your primary point of contact with the ground in a handstand. Ensuring they are mobile, strong, and prepared is non-negotiable to prevent injury and support sustained practice.
- Wrist Circles: Gently rotate your wrists in both directions to improve circulation and flexibility. Perform 10-15 circles in each direction before and after practice.
- Wrist Flexor and Extensor Stretches: Use your opposite hand to gently pull your fingers back and then forward, stretching the top and bottom of your forearms. Hold each stretch for 20-30 seconds.
- Finger Tip Push-ups: Start on your knees and push up onto your fingertips, engaging your hand and forearm muscles. This builds specific strength needed to grip the floor effectively.
By dedicating time to these foundational exercises, you’re not just preparing your body; you’re building confidence and creating a resilient base for your handstand journey. Consistency in this phase will pay dividends as you progress to more advanced drills, making the transition smoother and safer.
Building Shoulder Strength and Stability
Once your core and wrists are primed, the next critical step is to develop robust shoulder strength and stability. Your shoulders will bear the brunt of your body weight in a handstand, and without adequate preparation, you risk injury and frustration. This phase focuses on exercises that not only strengthen the deltoids and rotator cuffs but also teach your body to stack weight efficiently over your shoulders.
Shoulder stability is about more than just brute strength; it involves the intricate coordination of various muscles to create a solid, immovable platform. This means working on both concentric and eccentric contractions, as well as isometric holds, to prepare your shoulders for the dynamic and static demands of a handstand. Proper alignment is also key, ensuring that your bones and joints are stacked optimally to minimize muscular effort.
Targeted Shoulder Strengthening Drills
These exercises are designed to progressively increase your shoulder strength and endurance, mimicking the demands of a handstand and building the necessary resilience.
- Pike Push-ups: Start in a downward dog position with your hips elevated, then bend your elbows to lower the crown of your head towards the floor. This builds overhead pushing strength similar to a handstand. Begin with your feet on the floor and progress to elevating your feet on a block or chair.
- Wall Handstand Holds (Facing Out): Kick up into a handstand with your back against the wall. Focus on pushing the floor away, engaging your shoulders, and maintaining a straight line from wrists to shoulders to hips. Hold for increasing durations, starting with 15-20 seconds.
- Dolphin Pose to Forearm Stand Prep: This sequence strengthens the shoulders and prepares them for the inverted position. Move from Dolphin Pose, lifting one leg, then the other, feeling the weight shift into your shoulders and forearms.
Enhancing Shoulder Stability and Control
Stability drills teach your shoulders to remain engaged and controlled under load, which is crucial for maintaining balance in a handstand. This involves activating smaller, stabilizing muscles often overlooked in general strength training.
- Scapular Push-ups: In a plank position, keeping your arms straight, depress and protract your shoulder blades to move your chest towards the floor and then push back up. This isolates the scapular muscles, vital for shoulder control.
- Overhead Presses (Light Weights/Resistance Bands): Using light dumbbells or resistance bands, perform overhead presses. Focus on controlled movement throughout the entire range, emphasizing the lockout at the top and the slow descent.
Consistent practice of these shoulder-focused drills will not only fortify your shoulders but also instill a deeper understanding of proper alignment and engagement. This phase is about developing the power and endurance needed to support your body in an inverted position, making your handstand attempts more confident and sustainable.
Mastering Balance and Alignment Techniques
With foundational strength established, the focus shifts to the intricate art of balance and precise alignment. A handstand isn’t just about holding yourself up; it’s about finding that sweet spot where your body is perfectly stacked, minimizing effort and maximizing stability. This phase introduces drills that cultivate proprioception and body awareness, essential for fine-tuning your handstand.
Achieving balance in a handstand is a dynamic process, not a static one. It involves constant micro-adjustments and an acute awareness of your body’s position in space. Learning to align your body efficiently allows gravity to work with you, rather than against you, making the pose feel lighter and more sustainable. This stage emphasizes quality over quantity, focusing on mindful execution of each movement.
Drills for Enhanced Balance
These exercises specifically target the neurological pathways responsible for balance, teaching your body to respond instinctively to shifts in weight and position.
- Crow Pose (Bakasana): While not a handstand, Crow Pose builds arm balance and teaches you to shift your weight forward over your hands, crucial for feeling comfortable in an inverted position. Hold for 30-60 seconds, extending the hold as you gain confidence.
- L-Shaped Handstand at the Wall: Face the wall, place your hands shoulder-width apart, and walk your feet up the wall until your body forms an ‘L’ shape. Your hips should be directly over your shoulders. This teaches proper alignment and strengthens the core and shoulders in an inverted position. Hold for 20-30 seconds.
- Handstand Shifting (Wall-Assisted): In an L-shaped handstand, gently shift your weight from one hand to the other, momentarily lifting one hand a tiny bit off the floor. This develops the subtle muscular control needed for balance without the wall.
Understanding and Applying Alignment Principles
Correct alignment is the blueprint for a stable handstand. It ensures that your skeletal structure is supporting your weight efficiently, reducing strain on your muscles and joints.
- Stacking Joints: Visualize a straight line from your wrists through your elbows, shoulders, hips, and ankles. This vertical stacking is paramount for stability. Practice this alignment mentally and physically in wall-assisted handstands.
- Engaging the Gaze: Your gaze plays a significant role in balance. In a handstand, look slightly forward of your hands, not directly at them. This helps maintain a neutral neck and prevents your body from tipping backwards.
- Full Body Engagement: From pressing the fingertips into the floor to squeezing your legs together and pointing your toes, every part of your body must be actively engaged. This creates a unified, stable structure.
By diligently practicing these balance and alignment techniques, you’ll begin to understand the subtle nuances of a handstand. This phase is about cultivating a deep body awareness, allowing you to make the micro-adjustments necessary to hold the pose with grace and control, transforming a challenging feat into a fluid expression of strength and balance.
Progressive Inversion Techniques
With a foundation of strength, stability, and alignment, you’re now ready to delve into progressive inversion techniques that will lead you closer to a freestanding handstand. This stage is about gradually increasing your time inverted and developing the confidence to move away from the wall. It’s a delicate dance between pushing your limits and listening to your body, ensuring a safe and effective progression.
Progressive inversion means moving from fully supported inversions to less supported ones, building both physical capability and mental fortitude. Each step is designed to prepare you for the next, making the journey to a freestanding handstand feel less daunting. This phase emphasizes controlled entries and exits, as well as sustained holds, to build endurance and refine your technique.
Wall-Assisted Handstand Drills
The wall remains your best friend in this phase, offering support as you build confidence and refine your form without the fear of falling.
- Handstand Kick-ups to Wall: Practice kicking up to the wall with controlled movements. Focus on a light landing against the wall, rather than crashing into it. Alternate leading legs to develop balanced strength. Aim for 5-10 controlled kick-ups per side.
- Handstand Holds (Facing In): Kick up to the wall with your chest facing it. Walk your hands closer to the wall until only your nose or forehead lightly touches. This position encourages a straighter body line and builds confidence in a more vertical alignment. Hold for 20-30 seconds, gradually increasing duration.
- One-Leg Lift Off the Wall: In a wall-assisted handstand, gently lift one leg off the wall, hovering it for a few seconds before returning it. This challenges your balance and prepares you for freestanding attempts. Alternate legs.
Transitioning to Freestanding Attempts
This is where the magic begins, as you start to explore balance without the full support of the wall. Patience and persistence are your greatest assets here.
- Handstand Slides Away from Wall: Start in a chest-to-wall handstand. Gently push off the wall with your feet, trying to hold the handstand for a brief moment before returning to the wall. The goal is to feel the sensation of freestanding, even if for a second.
- Spotter-Assisted Handstands: If possible, work with a knowledgeable spotter who can gently support your legs or hips as you attempt freestanding handstands. This provides a safety net and allows you to focus on your alignment and balance.
This phase is marked by small victories and occasional falls, which are all part of the learning process. Embrace each attempt as an opportunity to learn and refine. By progressively challenging yourself with these inversion techniques, you will gradually build the physical and mental resilience needed to finally achieve a stable, freestanding handstand, marking a significant milestone in your practice.
Integrating Yoga Drills for Fluidity and Grace
While strength and balance are crucial, a truly mastered handstand possesses an element of fluidity and grace. This stage focuses on integrating various yoga drills into your practice to not only enhance your physical capabilities but also to cultivate a deeper connection between your breath and movement, making your handstand feel less like a struggle and more like an extension of your natural flow.
Yoga offers a rich tapestry of movements that can indirectly yet profoundly support your handstand journey. By weaving in specific poses and transitions, you develop holistic strength, flexibility, and body awareness that translates directly into a more graceful and controlled inversion. This integration fosters a sense of ease and confidence, moving beyond mere physical execution to a more embodied experience of the pose.
Yoga Poses Supporting Handstand Development
These poses build strength, flexibility, and spatial awareness in ways that directly contribute to handstand proficiency, preparing your body for the complex demands of the inversion.
- Adho Mukha Vrksasana (Handstand Prep): This is essentially a handstand, but the preparatory stages of kicking up and finding the wall are crucial. Practice controlled kick-ups from Downward-Facing Dog, focusing on engaging your core and lifting through your legs.
- Pincha Mayurasana (Forearm Stand): While different from a handstand, forearm stand builds immense shoulder and core strength, and teaches inverted balance without wrist strain. Practicing this can build confidence and strength that transfers to handstands.
- Warrior III (Virabhadrasana III): This standing balance pose strengthens the legs, core, and back, and improves proprioception. The focus on extending through the crown of the head and heel mimics the full-body extension required in a handstand.
Dynamic Transitions and Flow
Incorporating dynamic movements helps to develop the agility and coordination needed for controlled entries and exits from handstands, making the entire process feel more intuitive.
- Vinyasa Flow with Inversion Prep: Integrate sequences that move from Downward-Facing Dog to Plank, then to Dolphin Pose, and potentially to Handstand kick-ups. This builds heat, strength, and prepares the body for inversions in a flowing manner.
- Core-Centric Flows: Design short sequences that emphasize core engagement throughout, such as connecting boat pose, plank, and low plank. A strong, engaged core is the cornerstone of a fluid handstand.
By consciously integrating these yoga drills into your regular practice, you’ll find that your body becomes more attuned to the requirements of a handstand. The fluidity gained from these movements will not only make the handstand itself more accessible but also more enjoyable. This phase is about allowing your handstand to emerge naturally from a well-rounded and mindful yoga practice, embodying grace and strength.
Overcoming Mental Blocks and Fear
For many, the most significant hurdle in mastering handstands isn’t physical, but mental. Fear of falling, self-doubt, and past negative experiences can create powerful blocks that prevent progress. This phase addresses these psychological barriers, offering strategies to cultivate a resilient mindset and approach your handstand practice with confidence and calm.
Overcoming mental blocks is as crucial as developing physical strength. The mind-body connection in yoga is profound, and nowhere is it more evident than in challenging inversions like handstands. Learning to manage fear, cultivate self-compassion, and visualize success can dramatically accelerate your progress, transforming apprehension into anticipation.
Strategies for Building Mental Resilience
These techniques help to reframe your perspective on challenging poses, building mental strength and emotional regulation that extends beyond your yoga mat.
- Visualization: Spend a few minutes each day visualizing yourself successfully holding a handstand. Imagine the feeling of balance, the strength in your arms, and the calm focus in your mind. This primes your brain for success.
- Breathwork (Pranayama): Practice deep, conscious breathing, especially when feeling anxious about an attempt. Inhale deeply, exhale slowly, and allow your breath to calm your nervous system. Ujjayi breath can be particularly effective during practice.
- Positive Affirmations: Replace self-critical thoughts with positive affirmations. Instead of thinking, “I can’t do this,” try, “I am strong and capable. I am learning and growing.”
Addressing the Fear of Falling
Falling is an inevitable part of learning handstands, but it doesn’t have to be a source of fear. Learning how to fall safely is a critical skill that builds confidence and prevents injury.
- Practice Safe Exits: Learn how to safely cartwheel out of a handstand or roll out of it if you feel yourself losing balance. Practice these exits repeatedly until they become second nature. This knowledge reduces the fear of getting stuck or falling awkwardly.
- Use a Spotter: As mentioned previously, a spotter can provide both physical support and psychological reassurance, allowing you to attempt the pose with less apprehension.
- Start with Wall Support: Continue using the wall as a safety net, gradually reducing your reliance on it. This incremental approach builds confidence without overwhelming your nervous system.
By actively working on these mental strategies, you’ll discover that your handstand journey becomes not just a physical challenge, but a profound exercise in self-discovery and mental mastery. Overcoming the fear of inversions is a powerful testament to your inner strength, proving that with dedication and a positive mindset, you can achieve what once seemed impossible.
Your 6-Week Handstand Mastery Timeline (2025 Edition)
To truly embrace this Time-Sensitive Opportunity: Master Handstands in 6 Weeks with These Expert Yoga Drills (2025 Edition), a structured timeline is invaluable. This phased approach breaks down the journey into manageable weekly goals, ensuring progressive development and consistent momentum. Remember, consistency is more important than intensity; small, regular efforts yield significant results over time.
This 6-week timeline is designed to be flexible, allowing you to adjust based on your body’s needs and your daily schedule. However, adhering to the general progression will provide the most effective path to handstand mastery. Each week builds upon the previous, reinforcing learned skills and introducing new challenges, culminating in a confident, freestanding handstand.
Weekly Breakdown of Drills and Focus
Follow this structured plan, dedicating 3-5 days a week to practice, with rest days for recovery and integration.
- Weeks 1-2: Foundation & Preparation
Focus: Core strength (planks, hollow body holds), wrist mobility and strengthening, basic shoulder engagement (pike push-ups).
Goal: Build a solid physical base and understand proper hand and wrist alignment. - Weeks 3-4: Shoulder Power & Wall Confidence
Focus: Increased shoulder strength (more pike push-ups, wall handstands facing out), L-shaped handstands for alignment, intro to scapular push-ups.
Goal: Develop significant overhead strength and comfort being inverted against the wall. - Week 5: Balance & Micro-Adjustments
Focus: L-shaped handstand variations (one leg off wall), crow pose for arm balance, subtle weight shifting drills against the wall.
Goal: Begin to feel and understand the micro-adjustments needed for freestanding balance. - Week 6: Freestanding Attempts & Integration
Focus: Handstand kick-ups with lighter wall contact, spotter-assisted freestanding attempts, safe bail-out practice, visualization.
Goal: Achieve short, controlled freestanding handstand holds and develop confidence away from the wall.
Maintaining Practice and Preventing Plateaus
Even after achieving your first freestanding handstand, the journey continues. Consistent practice is vital for maintaining your skills and progressing further.
- Daily Warm-ups: Always begin with thorough wrist and shoulder warm-ups.
- Listen to Your Body: Rest when needed. Overtraining can lead to injury and burnout.
- Vary Your Drills: Keep your practice fresh by incorporating different drills and yoga flows to challenge your body in new ways.
- Seek Expert Guidance: Consider attending a workshop or seeking a personal coach for personalized feedback and advanced techniques.
By diligently following this 6-week timeline, you’ll systematically build the strength, balance, and mental fortitude required for handstand mastery. This structured approach, combined with consistent effort and a positive mindset, will empower you to achieve your handstand goals by 2025, opening up new dimensions in your yoga practice and beyond.
| Key Focus Area | Brief Description |
|---|---|
| Core & Wrist Prep | Essential for foundational stability and injury prevention; includes planks and wrist mobility drills. |
| Shoulder Strength | Develop robust overhead pushing power and stability through pike push-ups and wall handstand holds. |
| Balance & Alignment | Cultivate body awareness and stack joints efficiently using L-shaped handstands and micro-adjustments. |
| Mental Resilience | Address fear and self-doubt through visualization, breathwork, and safe falling techniques. |
Frequently Asked Questions About Handstand Mastery
While individual progress varies, a dedicated 6-week program can provide a strong foundation and lead to short freestanding handstand holds. Consistency in practice, typically 3-5 times a week, is more crucial than the duration of each session.
Common mistakes include inadequate wrist and shoulder warm-ups, insufficient core engagement, looking directly at hands (instead of slightly forward), and kicking up with too much force. Neglecting safe falling techniques also hinders progress due to fear.
Absolutely! The 6-week program is designed to progressively build upper body and core strength. Start with foundational exercises like planks and pike push-ups, and gradually increase intensity. Dedication to these drills will develop the necessary strength over time.
Fear of falling is natural. Focus on learning safe exit strategies like cartwheeling out. Practice against a wall, use a spotter if available, and try visualization techniques. Gradually reduce wall dependence as your confidence and physical control improve.
Consistency is paramount. Short, regular practice sessions (e.g., 15-20 minutes, 4-5 times a week) are far more effective than infrequent, long sessions. This allows your body to adapt and build muscle memory without overtiring, facilitating steady progress.
Conclusion
Embarking on the journey to master handstands in just 6 weeks is an ambitious yet entirely achievable goal with the right approach. This 2025 edition of expert yoga drills provides a comprehensive roadmap, guiding you through essential core and wrist preparation, robust shoulder strengthening, precise balance and alignment techniques, and crucial mental resilience strategies. By committing to this structured timeline and embracing both the physical and mental aspects of the practice, you’re not just learning a pose; you’re cultivating discipline, confidence, and a deeper connection to your body. Seize this time-sensitive opportunity to transform your yoga practice and experience the exhilarating world of inversions.


