Unlock Deeper Hip Flexibility: 3 Yoga Poses for 2025

Unlocking deeper hip flexibility can be achieved through specific advanced yoga poses, and by 2025, incorporating poses like the Bound Angle Pose (Baddha Konasana), Pigeon Pose (Eka Pada Rajakapotasana), and Frog Pose (Mandukasana) into your routine can significantly enhance mobility and reduce stiffness in the hips, preparing you for advanced yoga practices.
Ready to unlock deeper hip flexibility: 3 advanced yoga poses for 2025? This guide unveils three effective poses to help you achieve greater mobility and comfort.
Why Hip Flexibility Matters
Hip flexibility is often overlooked, but it’s crucial for overall well-being. It affects everything from posture to athletic performance.
Tight hips can contribute to lower back pain, knee problems, and even limit your range of motion in everyday activities. Let’s explore why improving hip flexibility is a goal worth pursuing.
The Benefits of Flexible Hips
More than simply touching your toes, flexible hips provide a multitude of benefits. They enhance athletic performance and prevent injuries.
- Reduced risk of lower back pain.
- Improved posture and balance.
- Increased range of motion in daily activities.
- Enhanced athletic performance, particularly in activities like running and cycling.
Understanding Hip Anatomy
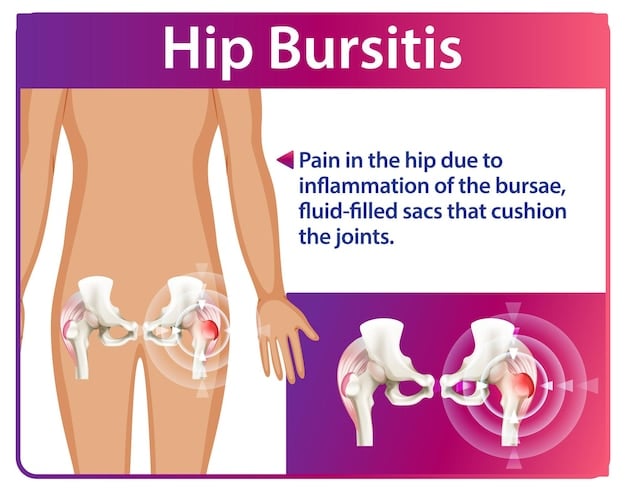
The hips are a complex joint involving many muscles and ligaments. Understanding this anatomy is key to safely increasing mobility.
The hip joint is a ball-and-socket joint, allowing for a wide range of movement. Knowing which muscles contribute to tightness can help you target your stretches.

In conclusion, hip flexibility impacts overall health and movement. Knowing the underlying anatomy can maximize the benefits of targeted stretches.
Essential Warm-ups Before Advanced Poses
Before attempting advanced poses, it’s crucial to prepare your body with a proper warm-up. This reduces the risk of injury and enhances the effectiveness of the stretches.
A well-structured warm-up increases blood flow to the muscles and prepares the joints for a greater range of motion. Ignoring this step could lead to strains or other injuries.
Dynamic Stretches for Hip Mobility
Dynamic stretches involve movement, helping to warm up the muscles and joints. They are essential for preparing the hips for deeper stretches.
- Leg swings (forward, backward, and sideways) gently mobilize the hip joint.
- Hip circles increase the range of motion in all directions.
- Cat-cow stretches warm up the spine and connect to the hips.
Holding Basic Poses
Holding basic poses gently challenges hip flexibility to prepare for more advanced poses.
Begin with foundational poses, like gentle hip openers, to gradually increase your flexibility. Never push beyond a comfortable range of motion.

To summarize, warming up with dynamic stretches and holding basic poses prepares your hips for the challenges of advanced yoga poses.
Pose 1: Bound Angle Pose (Baddha Konasana)
The Bound Angle Pose, or Baddha Konasana, is a classic hip opener that can be modified to suit different levels of flexibility.
This pose gently stretches the inner thighs, groin, and knees, and it can also stimulate abdominal organs. Let’s explore the steps involved in Baddha Konasana.
Step-by-Step Instructions
Follow these steps to safely perform Baddha Konasana:
- Sit with your spine straight and your legs extended in front of you.
- Bend your knees and bring the soles of your feet together.
- Gently pull your heels as close to your groin as comfortable.
- Allow your knees to drop open to the sides.
- Hold the pose for 30 seconds to 1 minute, breathing deeply.
Remember, it’s okay if your knees are not touching the floor. Focus on a gentle stretch rather than forcing the pose.
Modifications for Different Levels
Modifications can help make Baddha Konasana accessible for beginners or more challenging for advanced practitioners.
- If your knees are high off the ground, support them with blocks or blankets.
- To deepen the stretch, gently press your knees toward the floor.
- For an advanced variation, fold forward from the hips, keeping your back straight.
In conclusion, Baddha Konasana is a valuable hip opener. Modifications allow everyone to work within a comfortable range.
Pose 2: Pigeon Pose (Eka Pada Rajakapotasana)
The Pigeon Pose, or Eka Pada Rajakapotasana, is a powerful stretch for the hips and glutes and helps with unlock deeper hip flexibility: 3 advanced yoga poses for 2025 .
This pose can relieve sciatica and lower back pain, but it’s essential to approach it with caution. Let’s break down the proper steps for Pigeon Pose.
Entering Pigeon Pose Safely
Careful entry into Pigeon Pose is essential to prevent injury.
- Start on your hands and knees.
- Bring your right knee towards your right wrist, and your right foot towards your left wrist.
- Slide your left leg straight back, keeping your hips square to the front.
- If comfortable, lower your torso towards the floor.
- Hold the pose for 30 seconds to 1 minute, then repeat on the other side.
Ensure that your front shin is at an angle to your body, not parallel. This adjustment reduces pressure on the knee.
Variations and Precautions
Several variations can make the pose easier or more challenging.
- If you feel pain in your knee, come out of the pose immediately.
- You can use a blanket under your hip for support.
- For a deeper stretch, reach your back foot towards your head.
In short, done carefully, Pigeon Pose releases tension in the hips and lower back. Remember to listen to your body and adjust accordingly.
Pose 3: Frog Pose (Mandukasana)
The Frog Pose, or Mandukasana, is an intense hip opener that targets the inner thighs and groin. It is a way to help achieve unlock deeper hip flexibility: 3 advanced yoga poses for 2025.
This pose can be quite challenging, so it’s important to start slow and listen to your body. Let’s explore the proper technique for Frog Pose.
Proper Alignment for Frog Pose
Maintaining proper alignment is critical in Frog Pose to avoid injury.
- Start on your hands and knees.
- Widen your knees as far apart as comfortable, keeping your ankles aligned with your knees.
- Lower your hips towards the floor, keeping your back straight.
- Rest on your forearms, and ensure your hips are slightly forward of your knees.
- Hold the pose for 30 seconds to 1 minute, breathing deeply.
If you feel any gripping in your lower back, gently tuck your tailbone. This adjustment can help maintain a neutral spine.
Tips for a Comfortable Practice
Several tips can make Frog Pose more accessible:
- Place a blanket under your knees for cushioning.
- Do not force your knees too far apart.
- Engage your core to support your lower back.
In essence, Frog Pose is a powerful hip opener that requires patience and awareness. Listen to your body and respect your limits.
Integrating These Poses into Your Routine
Incorporating these poses into your regular yoga practice can dramatically improve your hip flexibility. However, consistency and mindful practice are key.
Start slowly and gradually increase the intensity and duration of the poses. Pay attention to your body’s signals and adjust accordingly.
Creating a Hip-Opening Sequence
A well-structured yoga sequence can maximize the benefits of these hip-opening poses.
- Begin with a warm-up, such as sun salutations, to prepare the body.
- Proceed with dynamic stretches, such as leg swings and hip circles.
- Then, incorporate Baddha Konasana, Pigeon Pose, and Frog Pose, holding each for 30 seconds to 1 minute.
- End with a cool-down, such as Child’s Pose or Savasana, to relax the body.
Listening to Your Body
Listening to your body is crucial to preventing injury.
Never force a stretch beyond a comfortable range of motion. If you feel pain, stop immediately and adjust the pose. Respect your body’s limitations and celebrate your progress.
Staying Consistent
Consistency is key to improving hip flexibility.
Aim to practice these poses at least 2-3 times per week to see noticeable results. Over time, you’ll likely experience increased range of motion and decreased stiffness.
In summary, these 3 yoga poses can definitely help you unlock deeper hip flexibility: 3 advanced yoga poses for 2025. Regular practice, mindful alignment, and consistency are crucial. By integrating these poses into your routine and listening to your body, you can achieve greater hip flexibility and overall well-being.
| Key Point | Brief Description |
|---|---|
| 🧘♀️ Warm-Ups | Essential for injury prevention; include dynamic stretches like leg swings. |
| 🦋 Baddha Konasana | Gently opens inner thighs, groin, and knees; modify for different levels. |
| 🕊️ Pigeon Pose | Releases tension in hips and lower back; enter and exit pose with caution. |
| 🐸 Frog Pose | Intensely stretches inner thighs and groin; maintain proper alignment. |
Frequently Asked Questions
▼
Hip flexibility is important for overall mobility, posture, and reducing the risk of lower back pain. It can also improve athletic performance and make everyday movements easier.
▼
For optimal results, aim to practice these poses 2-3 times per week. Consistency is key to improving hip flexibility and maintaining the benefits over time.
▼
If you experience pain, stop the pose immediately. Adjust your alignment, use modifications, or consult with a yoga instructor or healthcare professional.
▼
Beginners can try these poses with modifications. Start slowly and focus on proper alignment. It’s essential to listen to your body and not push beyond your limits.
▼
Contraindications can vary, but those with hip, knee, or back injuries should consult a healthcare professional before attempting these poses. Pregnant women should also consult their doctor.
Conclusion
Incorporating these advanced yoga poses into your routine can lead to significant improvements in hip flexibility, contributing to better overall health and well-being. Remember to practice mindfully, listen to your body, and stay consistent to reap the full benefits of these powerful stretches. Unlock deeper hip flexibility and find your 2025 glow!


