Mastering Advanced Inversions: A Step-by-Step 2026 Guide for Intermediate Yogis
Mastering Advanced Inversions: A Step-by-Step 2026 Guide for Intermediate Yogis
For many intermediate yogis, the allure of advanced inversions is undeniable. The seemingly gravity-defying grace of a handstand, the grounded strength of a headstand, or the elegant balance of a forearm stand represents not just physical prowess but also a profound mental shift. These poses challenge our perceptions, build immense core strength, and can even offer new perspectives, both literally and figuratively. As we move into 2026, the principles of safe and effective inversion practice remain timeless, yet our understanding of body mechanics and progressive training continues to evolve. This comprehensive guide is designed specifically for intermediate practitioners ready to take their practice to new heights, offering a step-by-step approach to mastering advanced yoga inversions.
Embarking on the journey of advanced yoga inversions requires more than just physical strength; it demands patience, consistency, and a deep understanding of alignment and body awareness. Fear, often the biggest obstacle, must be approached with mindfulness and a strategic plan. This article will break down the complexities of these poses, providing actionable advice, preparatory exercises, and essential safety tips to help you cultivate the confidence and capability to invert with control and grace. We’ll explore the foundational elements necessary for success, delve into specific techniques for key inversions, and discuss how to integrate these challenging poses safely into your regular yoga routine.
Understanding the Foundations of Advanced Yoga Inversions
Before launching into complex balancing acts, it’s crucial to solidify the foundational elements that support all advanced yoga inversions. Think of these as the building blocks upon which your inversion practice will safely and successfully stand. Neglecting these basics can lead to frustration, injury, or a plateau in your progress. Mastering advanced yoga inversions begins with a deep respect for these core principles.
1. Core Strength: Your Inversion Powerhouse
A strong core is non-negotiable for any inversion. It provides stability, protects your spine, and allows for the necessary control to lift and hold your body upside down. When we talk about core strength, we’re not just referring to visible abs; we mean the deep abdominal muscles (transverse abdominis), obliques, and erector spinae, all working in concert. Without this internal girdle of strength, your body will compensate, often leading to strain in the neck, shoulders, or lower back.
- Plank Variations: Beyond the standard plank, incorporate side planks, plank with hip dips, and plank with knee-to-elbow to engage different core muscles. Hold for longer durations and focus on maintaining a straight line from head to heels.
- Boat Pose (Paripurna Navasana): This pose is a phenomenal core builder. Progress from bent knees to straight legs, focusing on lifting through the chest and drawing the navel towards the spine.
- Leg Lifts: Lying on your back, slowly lift and lower straight legs. Control is key; avoid letting your lower back arch off the mat.
- Hollow Body Hold: A gymnastic staple, this involves lying on your back, lifting your head, shoulders, and legs slightly off the floor, rounding your lower back into the mat, and engaging your core deeply.
2. Shoulder Stability and Strength
Your shoulders are the primary weight-bearing joints in many inversions, especially handstands and forearm stands. Developing robust shoulder strength and stability is paramount to prevent injury and create a solid base. Weak or unstable shoulders will lead to collapsing, shaking, and an inability to hold the pose.
- Dolphin Pose (Ardha Pincha Mayurasana): An excellent precursor to forearm stand, Dolphin strengthens shoulders and upper back while stretching hamstrings. Focus on pressing forearms down and lifting hips high.
- Chaturanga Dandasana (Four-Limbed Staff Pose): Practicing correct Chaturanga builds incredible shoulder and triceps strength. Ensure elbows hug the ribs and shoulders don’t dip below them.
- Handstand Preps against the Wall: Start by facing the wall in a plank position, then walk your feet up the wall until your hips are over your shoulders. This builds endurance and familiarizes you with the feeling of weight on your hands.
- Pike Push-ups: Starting in a downward dog shape, lift your heels and bend your elbows, lowering the crown of your head towards the floor between your hands. This mimics the pressing action in handstands.
3. Awareness of Alignment
Proper alignment isn’t just about aesthetics; it’s about efficiency and safety. In inversions, gravity works differently, making misalignments more pronounced and potentially dangerous. Understanding how to stack your bones, engage the right muscles, and create a straight line is fundamental. This often means working with a mirror or a knowledgeable teacher to receive feedback.
- Plumb Line Concept: Imagine a straight line running from your wrists (in handstand) or forearms (in forearm stand/headstand) through your shoulders, hips, and ankles. Your goal is to align your body along this imaginary line.
- Engage the Serratus Anterior: This muscle helps stabilize your shoulder blades. Think of protracting your shoulder blades (pushing the floor away) to avoid winging.
- Pelvic Tilt: In many inversions, a slight posterior pelvic tilt (tucking the tailbone slightly) can help engage the core and prevent excessive arching in the lower back.
4. Overcoming Fear and Building Confidence
Fear of falling is natural when turning upside down. It’s an evolutionary instinct! However, allowing fear to dominate will hinder progress. Addressing fear requires a combination of physical preparation, mental conditioning, and strategic practice.
- Start with Wall Support: The wall is your best friend for building confidence. It provides a safety net, allowing you to focus on technique without the added stress of balancing.
- Practice Falling Safely: Learn how to safely bail out of an inversion. For handstands, this often means cartwheeling out. Knowing you can fall safely reduces anxiety.
- Visualize Success: Before attempting a pose, close your eyes and visualize yourself successfully executing it with perfect form. Mental rehearsal can prime your body for success.
- Small Steps: Don’t rush the process. Celebrate small victories, like holding a headstand for a few extra seconds or getting your hips higher in a handstand kick-up.
Mastering the Headstand (Salamba Sirsasana)
The ‘King of all Asanas,’ Salamba Sirsasana, is often the first advanced inversion intermediate yogis aim to master. It demands a balance of strength, stability, and calm focus. Approaching it systematically is crucial.
Step-by-Step Approach to Headstand
- Set Your Base: Kneel on your mat. Place your forearms on the mat, shoulder-width apart. Clasp your hands, interlacing your fingers to form a cup. Your elbows should be directly under your shoulders. This creates a strong, stable tripod.
- Position Your Head: Place the crown of your head on the mat, nestled into the cup of your hands. Your hands support the back of your head, not the neck. Ensure your forearms are pressing firmly into the mat.
- Lift Your Hips: Tuck your toes and lift your hips towards the ceiling, coming into a Dolphin-like position. Walk your feet closer to your elbows until your hips are stacked over your shoulders as much as possible.
- Engage and Lift: Keep pressing through your forearms, lifting your shoulders away from your ears. Engage your core deeply. Gently lift one knee towards your chest, then the other, bringing both knees in. This is a compact, stable position.
- Extend Upwards: Slowly extend your legs towards the ceiling. Imagine a plumb line from your shoulders through your hips to your heels. Keep your legs active, pressing through your heels or pointing your toes.
- Hold and Breathe: Once stable, find your breath. Focus on maintaining length through your spine and engaging your entire body.
Headstand Variations and Tips for Mastering
- Wall Support: Practice against a wall initially. Start with your feet on the wall, then gradually try to float them away for brief moments.
- Controlled Descent: Learning to come down slowly and with control is as important as going up. Reverse the steps, bringing knees to chest, then slowly lowering feet to the mat.
- Neck Safety: Never collapse into your neck. The weight should be primarily in your forearms and shoulders, with only minimal pressure on the crown of your head. If you feel neck strain, come down immediately.
- Core Engagement: Continuously draw your navel towards your spine to stabilize your core and protect your lower back.
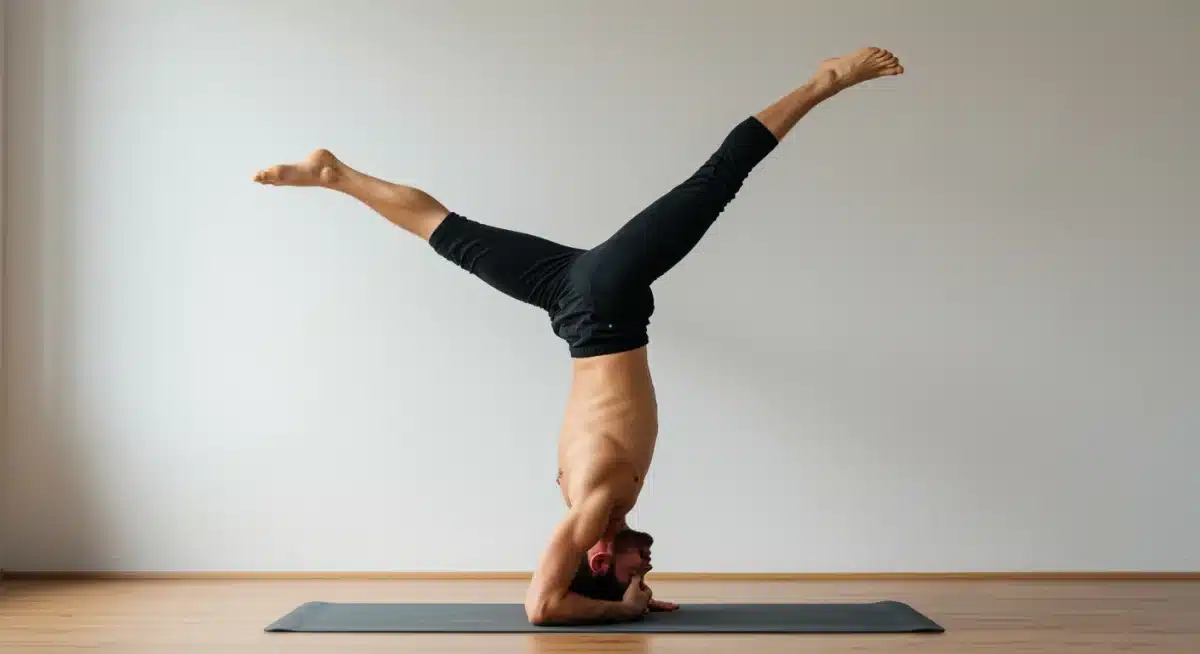
Conquering the Forearm Stand (Pincha Mayurasana)
Pincha Mayurasana, the Forearm Stand, is a beautiful and challenging inversion that requires significant shoulder stability, upper body strength, and core control. It’s often seen as a stepping stone between headstand and handstand, demanding more independence from the head and neck.
Step-by-Step Approach to Forearm Stand
- Establish Your Base: Start in Dolphin Pose. Place your forearms on the mat, parallel to each other, shoulder-width apart. Your palms can be flat or hands can be clasped loosely. Press down firmly through your entire forearm, especially your inner wrists.
- Walk In: Walk your feet closer to your elbows, lifting your hips high, aiming to stack your hips over your shoulders. Keep pressing the floor away with your forearms.
- Kick or Press Up: From your Dolphin position, you have a few options:
- Single Leg Lift: Lift one leg straight up towards the ceiling.
- Gentle Hop: Take a small hop with the bottom leg, aiming to lift your hips further over your shoulders. Avoid a wild kick; focus on controlled lift.
- Press Up (Advanced): For those with significant core and shoulder strength, you can press up from Dolphin, lifting both legs simultaneously without a hop.
- Find Your Balance: Once you’re up, engage your core, draw your ribs in, and reach through your feet. Keep pressing through your forearms to avoid collapsing in the shoulders. Look slightly forward, not straight down.
- Refine Alignment: Work towards a straight line from your forearms through your shoulders, hips, and heels. Avoid excessive arching in the lower back. Engage your glutes and inner thighs.
Forearm Stand Variations and Tips for Mastering
- Wall Practice: Utilize the wall extensively. Kick up to the wall, letting your feet rest there as you build strength and confidence. Gradually push off the wall for short periods.
- Strap Around Arms: Place a yoga strap just above your elbows to prevent them from splaying out. This helps maintain shoulder-width alignment.
- Block Between Hands: Squeeze a block between your palms (if hands are clasped) to engage the inner arms and shoulders more effectively.
- Gaze Point: A consistent gaze (drishti) can help with balance. Often, looking slightly forward between your hands is recommended.
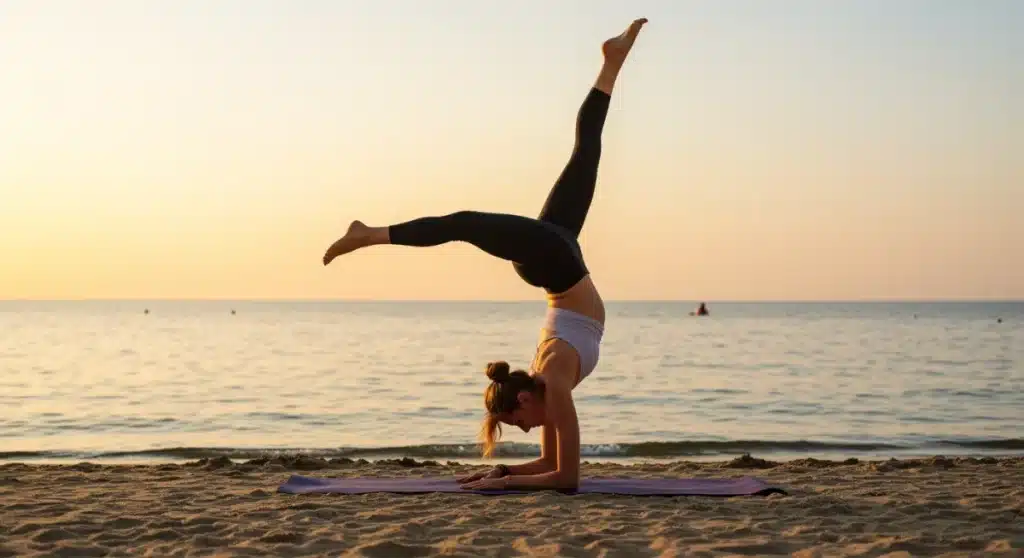
Achieving the Handstand (Adho Mukha Vrksasana)
The Handstand is perhaps the most iconic and challenging of advanced yoga inversions. It demands immense upper body strength, core engagement, balance, and a significant degree of fearlessness. It’s a journey, not a destination, and consistent practice is key.
Step-by-Step Approach to Handstand
- Hand Placement: Place your hands on the mat, shoulder-width apart, fingers spread wide, and palms pressing down firmly. Engage your fingertips, as if clawing the mat, to create suction and stability.
- Pike Position: Start in Downward-Facing Dog. Walk your feet closer to your hands, lifting your hips high, coming into a pike shape.
- Shift and Kick/Press: From your pike, shift your weight forward, stacking your shoulders over your wrists. Gaze slightly forward between your hands.
- Kick-Up (Most Common): Lift one leg straight up, then take a controlled hop with the other leg, aiming to meet the first leg in the air. Focus on lifting your hips over your shoulders rather than simply kicking hard.
- Press-Up (Advanced): With significant core and shoulder strength, you can press up from the pike position, lifting both legs simultaneously without a hop.
- Find Your Line: Once inverted, engage your core, draw your ribs in, and lengthen through your spine. Reach through your feet, keeping your legs active. Avoid letting your lower back arch excessively.
- Active Shoulders: Continuously press the floor away, lifting your shoulders towards your ears (shrugging up) to create space and stability in your shoulder girdle.
Handstand Variations and Tips for Mastering
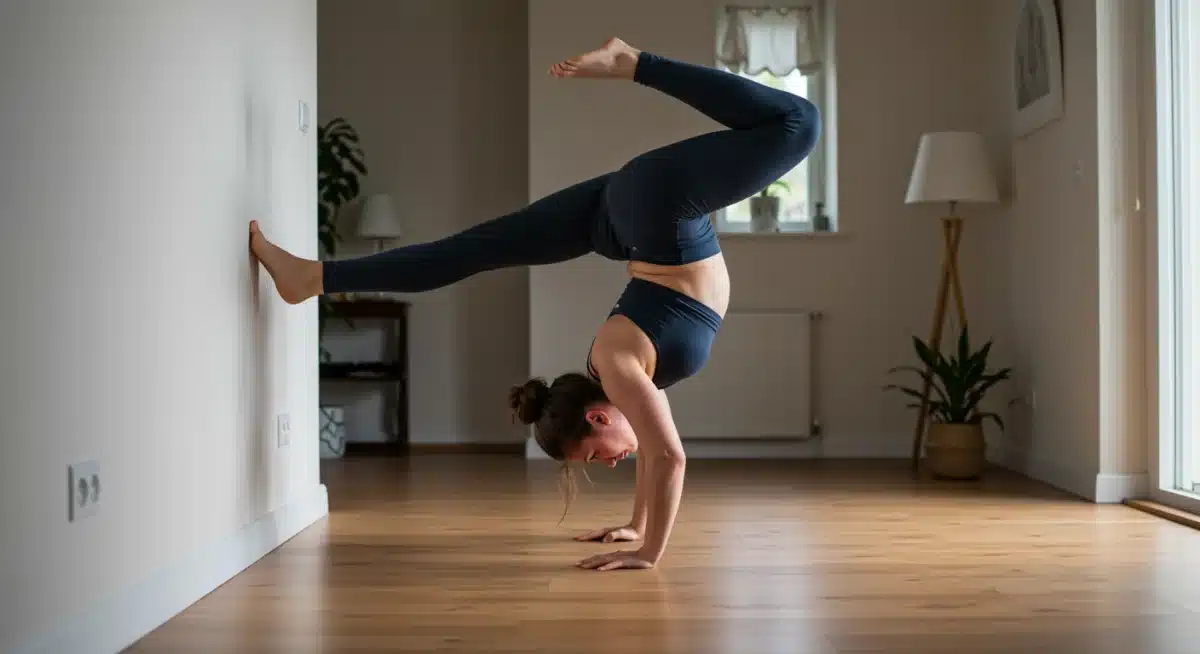
- Wall Handstand: This is indispensable. Practice facing away from the wall (kicking up to it) and facing the wall (walking feet up) to build strength and confidence. Use the wall to find your alignment.
- Wrist Prep: Handstands put a lot of pressure on the wrists. Incorporate wrist warm-ups and stretches into your routine to prevent injury.
- Finger Engagement: Don’t overlook the power of your fingertips. They act like brakes and accelerators for balance.
- Hollow Body Shape: Practice the hollow body hold on the floor. This shape is crucial for a stable handstand, preventing a ‘banana back.’
- Spotter: If possible, work with a knowledgeable spotter, especially when first attempting to balance away from the wall.
Integrating Inversions Safely into Your Practice
Mastering advanced yoga inversions isn’t about rushing; it’s about intelligent, consistent, and safe practice. Here’s how to integrate them effectively into your yoga routine:
Warm-Up Thoroughly
Never attempt inversions on cold muscles. A comprehensive warm-up should include:
- Sun Salutations: To warm the entire body.
- Core Strengthening: Planks, boat pose, leg lifts.
- Shoulder Openers and Strengtheners: Dolphin, downward dog, eagle arms, cow face arms.
- Wrist Preparation: Gentle circles, stretches, and weight-bearing on hands.
Listen to Your Body
Some days you’ll feel stronger and more balanced than others. Respect this. If you’re tired, stressed, or feeling unwell, choose a less intense inversion or skip them altogether. Pushing through fatigue increases the risk of injury.
Consistency Over Intensity
Short, consistent inversion practices (10-15 minutes, 3-5 times a week) are far more effective than sporadic, intense sessions. Regularity builds muscle memory and confidence.
Cool Down and Counter Poses
After an inversion practice, it’s essential to cool down and offer counter poses to re-lengthen and relax the spine and neck.
- Child’s Pose (Balasana): Releases tension in the back and neck.
- Gentle Twists: To decompress the spine.
- Shoulder Stretches: Such as Eagle arms or thread the needle.
- Savasana (Corpse Pose): Essential for integration and relaxation.
When to Avoid Inversions
There are certain situations where inversions should be avoided or approached with extreme caution:
- High Blood Pressure or Heart Conditions: Consult a doctor first.
- Glaucoma or Other Eye Conditions: Increased pressure can be harmful.
- Neck or Spinal Injuries: Absolutely avoid without medical clearance and expert guidance.
- Pregnancy: Especially in the later trimesters, or if you’re new to inversions.
- Menstruation: Some traditions advise against inversions during menstruation, though this is a personal choice.
- Headaches or Dizziness: These are clear signals to avoid going upside down.
Advanced Inversion Drills and Exercises for 2026
To truly master advanced yoga inversions, incorporating specific drills into your routine can accelerate your progress and refine your technique. These exercises target the strength, control, and body awareness needed for sustained inversion practice.
Scapular Push-ups (for Handstand/Forearm Stand)
These are crucial for shoulder stability. In a plank position or forearm plank, keep your arms straight and simply depress and protract your shoulder blades, letting your chest drop slightly between your arms and then pushing back up. This isolates the serratus anterior.
Pike Handstand Holds (against wall)
Face the wall in a handstand position, but keep your legs bent in a pike, with your feet on the wall. The goal is to get your hips stacked directly over your shoulders and wrists. This builds endurance in the shoulders and core in an inverted position without the full challenge of straight legs.
L-Handstand Holds (against wall)
Facing the wall, walk your hands away until your body forms an ‘L’ shape, with your torso parallel to the floor and legs straight up the wall. This is an incredible core and shoulder strengthener, mimicking the full handstand shape but with wall support for the legs.
Hollow Body Rocks
Lying on your back, lift your head, shoulders, and legs off the floor, keeping your lower back pressed into the mat. Gently rock back and forth. This exercise builds the deep core strength and body tension essential for a stable inversion.
Controlled Descending (from wall handstand/forearm stand)
Instead of just flopping down, practice lowering yourself slowly and with control from an inversion (using the wall if needed). This builds eccentric strength, which is vital for both entering and exiting poses gracefully.
The Mental Game: Mindset for Inversion Mastery
Beyond the physical, the mental aspect of advanced yoga inversions is perhaps the most challenging and rewarding. It’s an exercise in mindfulness, perseverance, and self-belief.
Patience and Persistence
Inversions don’t happen overnight. There will be days of frustration and seemingly no progress. Embrace the journey, celebrate small improvements, and remain persistent. Each attempt, whether successful or not, teaches you something valuable about your body and balance.
Breath Awareness
When fear or struggle sets in, our breath often becomes shallow and erratic. Consciously returning to a steady, deep breath can calm the nervous system, increase focus, and provide the internal stability needed to hold challenging poses.
Non-Attachment to Outcome
Practice inversions for the sake of practice, not solely for the goal of holding a perfect pose. The process of learning, building strength, and overcoming fear is the true reward. Detach from the outcome, and often, the outcome you desire will follow more naturally.
Finding Your Drishti (Gaze Point)
A steady gaze is critical for balance in inversions. For headstands and forearm stands, often a point slightly forward on the mat works best. For handstands, gazing forward between the hands can help. Experiment to find what works for you, and once found, commit to that gaze.
Conclusion: Your Journey to Advanced Inversion Mastery in 2026
Mastering advanced yoga inversions is a testament to dedication, strength, and mental fortitude. As we navigate 2026, the path to these exhilarating poses remains grounded in fundamental principles: building a strong core and stable shoulders, understanding precise alignment, and confronting fear with strategic practice. This guide has provided you with a comprehensive roadmap, from foundational exercises to specific techniques for headstands, forearm stands, and handstands.
Remember that the journey itself is the most profound teacher. Each fallen attempt, every moment of wobbling, and every second of stable flight contributes to your growth as a yogi. Be patient with yourself, consistent in your efforts, and always prioritize safety. Embrace the challenge, enjoy the process of turning your world upside down, and discover the incredible strength and confidence that advanced yoga inversions can bring to your practice and your life. With dedicated practice and mindful attention, 2026 can be the year you truly master advanced yoga inversions, unlocking new dimensions of your physical and mental capabilities.


